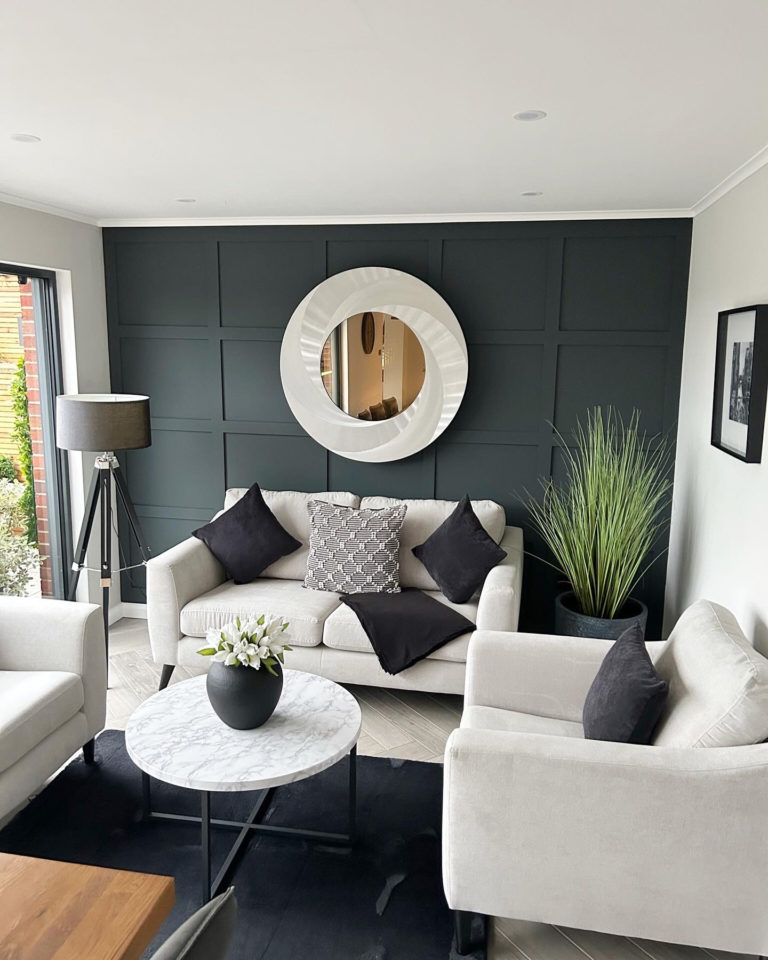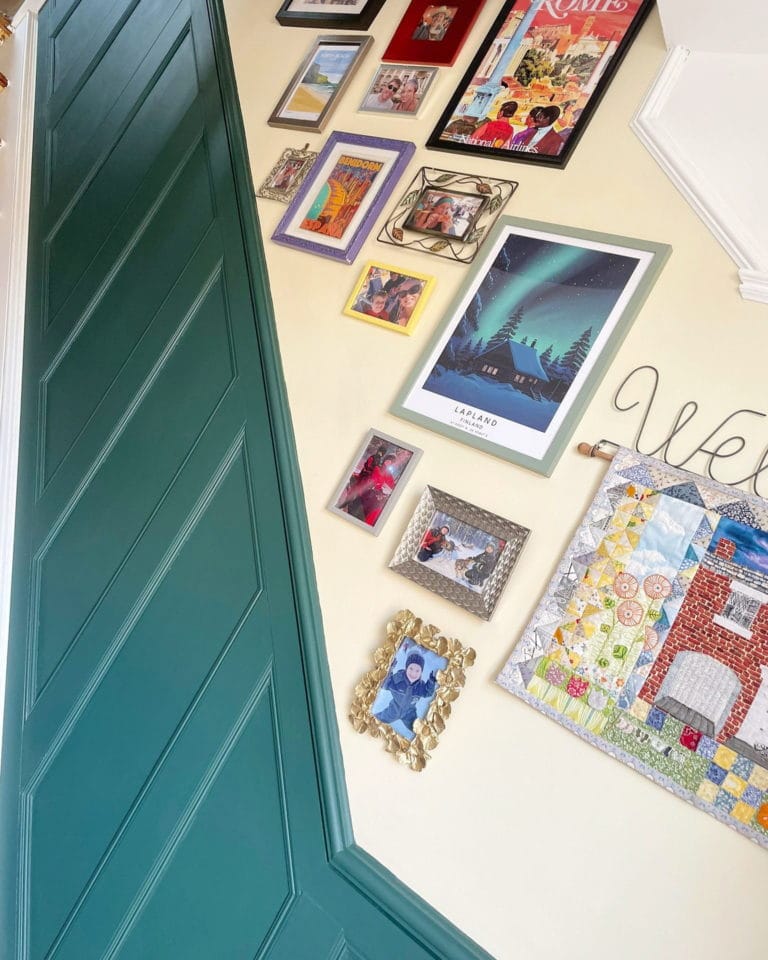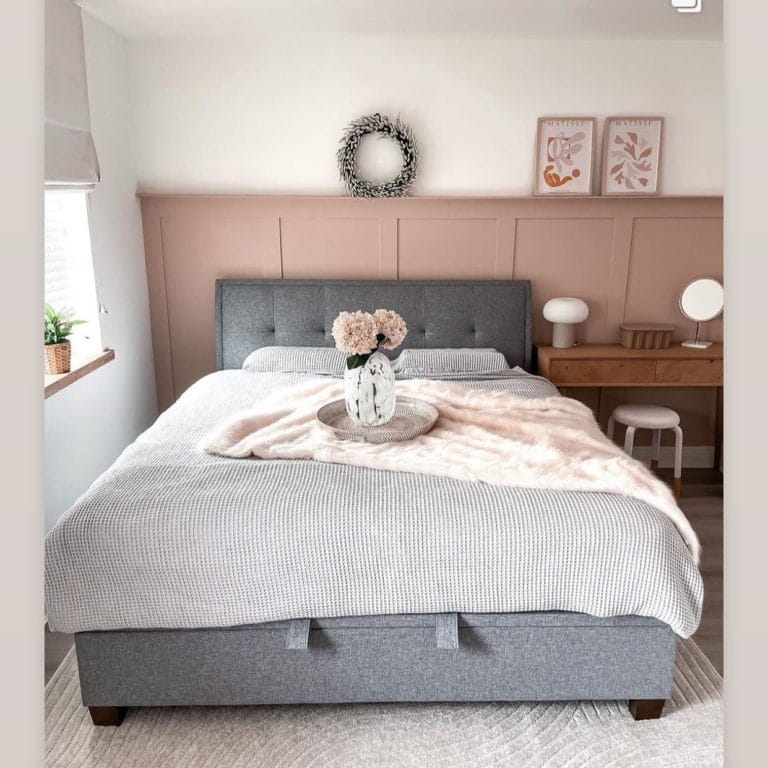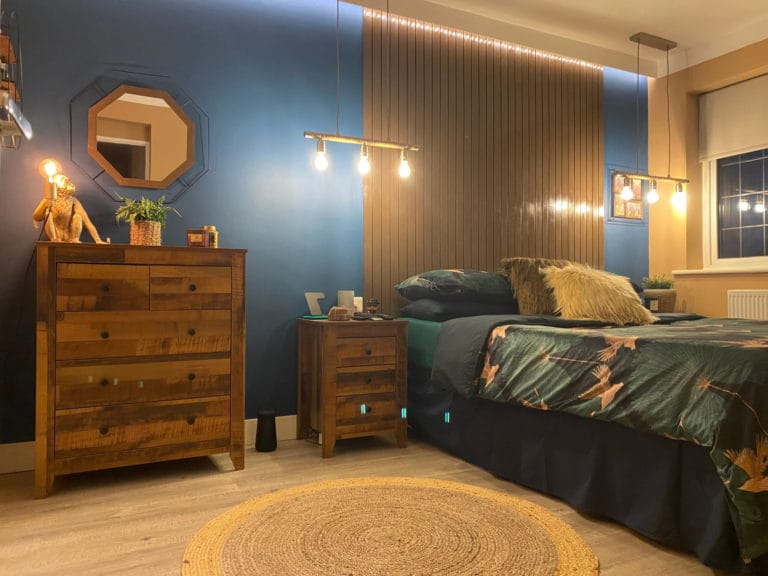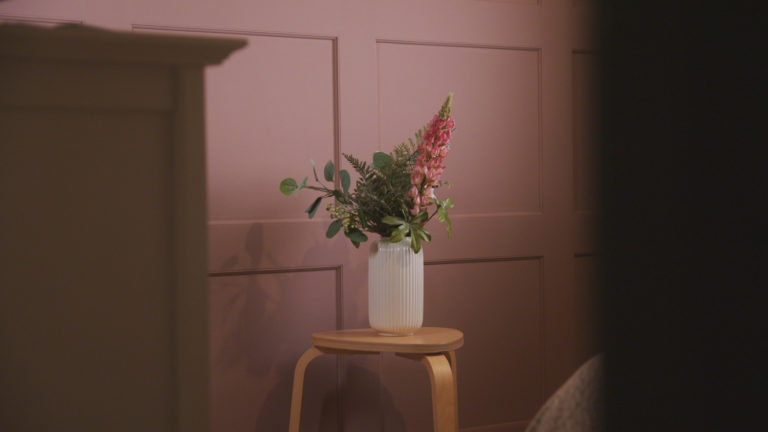
Victorian properties are among the most beautiful examples of architecture in the UK. Well proportioned and originally completed with sash windows, cornicing, ceiling roses, fireplaces and panelling, Victorian houses are traditionally full of character and charm. Over the years though, many have been stripped of their original features, removing most of the details that makes a Victorian home beautiful.
One of the easiest and most impactful features that you can restore is the panelling. Read on to find out more about renovating a Victorian house with half wall panelling…
Panelling in Victorian Properties…
Beginning in 1837 and ending in 1901, during the Victorian era there was a huge boom in the number of houses being built in Britain. While wall panelling was not new to Victorian properties, it did become even more popular during this time, which is why it’s often considered a Victorian feature.
Typical Victorian panelling was up to the middle of the wall, or half wall panelling, rather than floor to ceiling panelling. It was capped off with a dado rail, which was added to protect the walls from chair backs.
Victorian interiors were often busy, with lots of textures, different fabrics, patterns and rich colours. Today Victorian properties can easily be adapted to suit more contemporary styles, and often are one of the best styles of period houses to create a modern look.
Adding Half Wall Panelling to Your Victorian Home…
When it comes to reinstating panelling in your home, it’s best to opt for half wall panelling, as this is the style that would have been originally installed in the property (if any). When renovating a Victorian house, it’s important to be sympathetic to the age of the building, but also keep in mind that this type of property will also suit more modern styles too.
Wall panels laid out to create rectangles or squares were the most popular styles in Victorian properties. You can use our wall panelling kit creator to achieve this style. If you are going for half wall panelling, simply measure vertically to the height that you want the panelling to finish at, and horizontally across the width of your wall. Put these numbers into our calculator and we will provide an instant quote. This makes designing and making your panelling easy, as you will receive all of the panels that you need cut to size, and primed (which is free with our panelling kits), ready to be installed in your home.
Reintroducing panelling to your Victorian property is a great way to restore the original character and charm. Panelling was traditionally mostly found in hallways, reception rooms and bedrooms, but it also looks great in bathrooms and kitchens too – really, it can work anywhere in Victorian homes. To get started, head over to our panelling kit creator now.
When freshening up your home’s interior design, these bedroom wall panelling ideas are a great place to start.
As the first room you see in the morning and the last one you see at night, having a welcoming and cosy bedroom is essential. And a key element to consider is the walls.
Wall panels are an easy way to add textures and interest to a room, making them an increasingly popular choice for home DIYers. Whether updating your master bedroom, nursery or spare bedroom, panelling is definitely worth thinking about.
Ready to redecorate your room? Here are our top bedroom wall panelling ideas to suit a range of homes and styles.
1. Arrange wall panels in classic squares
For an understated (and very chic) look, try shaker wall panelling. This is a classic, timeless design where panels are arranged in evenly spaced squares on the wall. It’s a versatile style, suiting a wide range of homes and spaces. As such, it’s a super popular way for DIYers to improve their bedroom walls.
Symmetrical panelling is always pleasing to the eye, creating a tranquil environment. It’s a style that suits just about any house, new and older properties alike.
To find the right panels for your room, use our cut-to-size panelling tool or see our range of DIY panel strips.
Top tip: If you have a modern bedroom, wider panelling strips are a good option. These create a chunky looking panelled wall, which tends to suit contemporary home designs.
2. Create a panelled headboard
You don’t necessarily need to panel your entire room to make an impact. Instead, panelling just behind your bed creates the appearance of a built-in headboard, adding character and elegance.
A good way to approach it is by panelling the wall around the bed and painting it a bold colour, with the rest of the wall painted in a complementary tone. This helps to make the bed the focal point.
To simplify the process, we’ve made a tool to create a bespoke headboard panelling kit. Just enter the dimensions of your desired panels, and we’ll provide an instant quote. Better yet, we offer a free priming service with panelling kits, and you’ll receive your panelling cut to size and ready to install.
3. Add half-wall panelling to your room
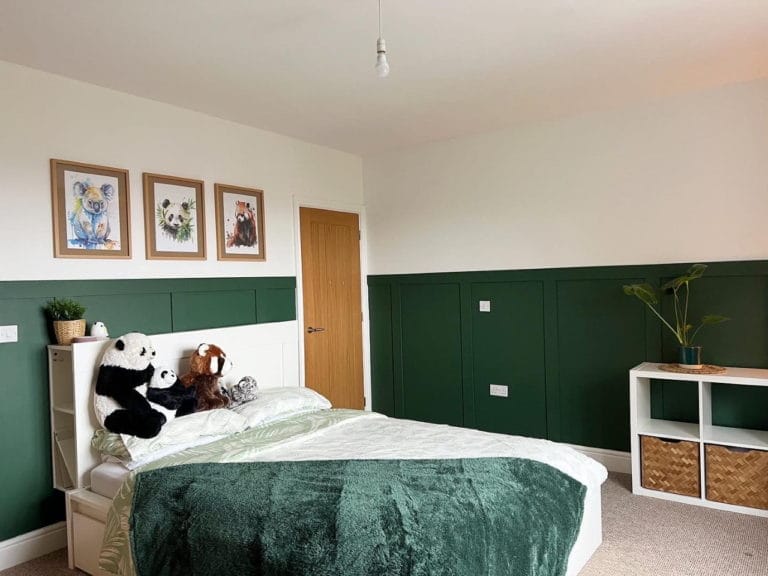
To go one step further than a panelled headboard, an alternative is to panel the bottom half of an entire wall with decorative panel strips. You could either focus on just one feature wall (usually the one behind the bed) or apply the panelling to the whole room. Either way, it will elevate the room with a sophisticated yet homely look.
Half-wall panelling is worth considering if you have a small room, where a panelled headboard would cover most (but not all) of the wall. It avoids any glaring gaps between the panelling and nearby corners of the room.
Having said that, it can also help in a large bedroom to fill the space a bit more. Long, bare walls can sometimes make rooms feel a bit sparse. So, in cases like these, panelling enriches the walls with interesting designs.
A popular trick is to paint the half-wall panelling in a deep, luxurious colour like navy or maroon that contrasts the rest of the wall. The rich tones will give the feel of a boutique hotel, offering a sense of cosiness without being overpowering.
4. Use vertical or horizontal panels on bedroom walls

Especially if you have a small bedroom, think about wide-set vertical panels. These keep the look simple and enhance the space, without making the room feel too busy.
A vertical arrangement of panels gives the appearance of height, helping to make ceilings feel taller.
Horizontal panelling, meanwhile, can make rooms feel wider and more spacious.
Think about whether your room would benefit more from feeling taller or wider, as this can help you decide which panel arrangement to use.
To achieve either look, one option is to install MDF wall panel strips from floor to ceiling, with around 30cm gaps between each one. They can be easily glued to the wall with no-nails adhesive, and are ideal if you’re new to panelling.
Alternatively, use tongue and groove panelling to get the look of a cosy cabin or country retreat. This is where panels have interlocking boards to achieve smooth, minimalist lines. If you look for wainscoting panels, these will look elegant while having the added benefit of protecting the walls from scuffs.
5. Make a statement with 3D effect panels
A top bedroom panelling idea with a modern twist is decorating the wall behind your bed with 3D effect panels. Our collection includes MDF panels in a range of designs like chevrons and tiles.
These make a bold statement when installed across an entire wall, offering some extra visual interest to the room.
To ensure the panelled feature wall blends in with the existing décor, try colour drenching the wall. So if, say, the rest of the room has white walls, you could paint the panelled wall entirely white too. This way, the dramatic texture will continue to stand out while being cohesive with the rest of the bedroom.
If you’re feeling creative, another option is to apply thin panelling strips in custom geometric designs. This will help you achieve the perfect panelling for the wall, designing it all to fit the specific dimensions. The resulting look will make an impact with fun, abstract panelling that’s unique to your room.
And this tip doesn’t only apply to bedrooms. Geometric wall panels also add depth in living rooms, as we cover in our list of the best home wall panelling ideas.
6. Frame wall art with panelling
Depending on the size and arrangement of your wall art, panelling can offer the perfect backdrop.
For example, if you have three large images to go along one wall (each of the same size) you could add panelling strips in rectangular shapes along the bottom half of the wall. As long as the images are all in line with the panels, it will offer an overall look of balance.
Alternatively, you could add the panels around the artworks like built-in frames. To make sure it all looks deliberate and carefully curated, we suggest adding the panelling symmetrically across the wall.
7. Combine panels with the right lighting
For optimum effect, take the time to choose the best lighting for your panelling.
In particular, consider how you want the shadows to fall from the panels. For lighter shadows, it can help to get soft lights. Combined with this, we suggest thinking about panels with beading to avoid heavily defined lines across the wall. In smaller rooms especially, this helps to keep rooms feeling open.
Or, if you’re creating a bold, geometric look, you might decide to introduce stronger lighting that highlights the panels’ clean lines.
For inspiration, see our Instagram for lots of beautiful rooms with expertly arranged panels and lighting.
As well as lighting, it’s also important to ensure the paint colours you choose work well. If, say, you’re adding warm lights to the room, it can help to use warm-coloured paints, such as creams, reds or oranges. Thinking carefully about all of these details will help you bring the whole look together and create the panelled bedroom of your dreams.
To start DIY wall panelling, follow the easy steps to panel a wall.
A panelled headboard is a fantastic way to add texture and interest to your bedroom, without the need for fussy wallpapers or bold and bright colours. Of course panelled headboards can work with these elements should you wish, but in many cases, a panelled headboard is striking and impactful on its own. If you are considering this look, here’s everything you need to know about how to create a panelled headboard…
Panelled Headboards Explained…
Panelled headboard walls provide a unique approach to the traditional headboard. Instead of the headboard being part of the bed, the panelled wall behind the bed becomes the headboard. Typically, this would involve panelling just a section of the wall, instead of the whole wall, as this gives the illusion of a headboard behind the bed. However, there are no rules here and should you want to play with scale, you could consider panelling the entire wall from floor to ceiling.
Types of Paneled Headboard Walls…
The style of panelling you decide to use will impact the overall look and feel of your space. Square and rectangle shaker style panelled walls work well in both modern and traditional properties, and are the most popular choice for a panelled headboard due to being symmetrical and uniform. These styles work best for this look, however you could look into alternative panelling styles, such as tongue and groove.
Once you’ve decided on the style of panelling that you want to use for your panelled headboard, it’s time to decide on the size and shape. The key here is to consider how big of an impact that you want to make. If you’re opting to create a more subtle look, try half wall panelling behind your bed, running across the full width of the wall. For more of a statement piece, go for floor to ceiling panelling that’s the width of the bed, or extend the panelling beyond the bed to finish at the outer edges of your bedside tables.
Designing and Installing your Panelled Headboard…
Once you’ve decided on a concept, it’s time to make your vision a reality. Before you look at ordering your panelling, consider your lighting plan, as typically you will want lighting of some sort on either side of the bed. Wall lights work particularly well with panelled headboards, so consider whether you might need to get an electrician to do any wiring or fit new lighting before or after you install your panelling.
Next it’s time to buy your panelling. Today there’s little need to use wood to create your panelling. Instead use MDF panel strips, which work just as well, but are much more cost effective. When it comes to measuring up and buying your panelling strips, take the guesswork out of and make the whole job easier with our headboard panelling kit creator. Allowing you to preview your design and providing an instant quote, all you have to do is input the height and width of the area you want to panel. You will then receive your kit, cut to size and ready to install. We even offer a free priming service, so that once it’s on the wall, all that’s left to do is paint your panelled headboard in your chosen colour.
A panelled headboard is a great way to make a statement in your bedroom, and is sure to elevate your scheme.
With wall panelling increasing in popularity, more and more people are looking into how to install their own panelling in their homes. This on-trend style suits both contemporary and period properties, and is a fantastic way to elevate any space, adding character and interest. If you are considering introducing panelling to your home, here are five top tips to make for easy wall panelling…
Opt for MDF Wall Panels
Panelling found in older properties is usually made from wood, however if you are installing new panelling, there’s no need to use this costly material. MDF panel strips work just as well and will create the same great look, at a fraction of the price. They are also easy to install and are versatile, allowing you to create all sorts of panelling styles.
Fully Prep your Walls
Before you install your panelling, it’s important to ensure your walls are straight and smooth. This will help you create panelling that is also straight and smooth, and will make installation easier than working with walls that are uneven. In older properties, walls are often not even, and so if this is the case, consider using backboard to create a flat surface.
Choose Ready Primed Panels
MDF panels need to be primed before they can be painted. If you choose unprimed panels, you will need to prime these either before you install them, or once they are on your walls. This can often be a lengthy process, so consider buying panels that come ready primed. We offer a free priming service with all of our panelling kits, and you can add on priming when buying individual strips too.
Use a Panelling Kit
One of the most complex stages of creating panelled walls is certainly working out all of the measurements, and then cutting panels to size to fit. Take this step out, by using our panelling kit creator. Simply put in the measurements of the wall that you want to panel, and we will do the rest for you. You’ll get an instant quote online, and will receive your kit, all cut to size and ready to install, plus as mentioned above, you can even receive your panels ready primed at no extra cost.
To make things as straightforward as possible, consider buying a wall panelling kit. This will provide all of the panels that you need to create your panelled wall, all cut to size and ready to be installed. They can then simply be glued into place and painted to create your finished look.
If you’re planning on creating your own wall panelling to enhance your home, check out our full collection.
Use Moisture Resistant MDF in Bathrooms and Kitchens
Save yourself a headache in the long run and always opt for moisture resistant MDF panels in any room where moisture levels are higher than usual. Using normal MDF in bathrooms and kitchens will result in warping over time, which will mean you will have to replace your panelling. By choosing MR MDF panels you can ensure that your panelling will look great for years to come, despite higher humidity levels.
While DIY wall panelling might look complex, if you follow these five tips, you can create great looking panelling with ease.
When it comes to transforming your home; there are lots of options out there for you to consider and think about. Some of these changes are subtle and small, whereas others are much bigger and more impactful.
One option to change the look of your home that is rising in popularity is wall panelling. Wall panelling is synonymous with Victorian and Georgian homes, however, this doesn’t mean that it is dated, instead, it is becoming increasingly popular in contemporary interiors, and is regularly used by professional designers to add character and interest to modern homes.
Wall Panelling: A Brief History…
Wall panelling in interiors can be dated back to the Gothic period, which dates back to the 12th century and includes the Tudor and Elizabethan periods. Panelling was elaborate, made from wood and stained in dark and warm tones to emphasise the richness of the space. During the English Renaissance, panelling styles became more simple, whereas in the Italian Renaissance, panelling was only used on ceilings.
In the Victorian Era, panelling was first used for practical reasons, protecting walls from scuffs and marks, and so it was traditionally only applied to the lower half of the wall and finished at the dado rail. Later they would be seen as decorative too, as skirting boards, cornicing and ceiling roses all added to the character of a home.
Today panelling is a popular way of adding interest and texture to our interiors, but it still offers the great practical benefits that it always has.
Different Types of Wall Panelling…
There are lots of different types of wall panelling in different styles, these include:
- Wainscoting
- Shiplap
- Flat panel
- Beadboard
- Raised panels
- Tongue and groove
- Board and batten
What are the Benefits of Each Type of Wall Panelling?
While there are some similarities between the different types of panelling, there are also some things that may make them better for you and your home.
Wainscoting panelling is a good idea if you want to just add touches to a wall. It is most commonly used for accents or feature walls; however, it can also be used to hide any walls that are damaged or that you want to renovate.
Those parts of your house that need a clean and smooth look, will probably suit flat panels most. They are incredibly sleek, which creates a look that is not only contemporary and modern but also sleek too.
It comes as no surprise that raised panels are the opposite of flat panels. Those who choose raised panels will usually do so because they want a bold and incredibly noticeable option for their home. Not only are they ideal for homes, but they can also be used in commercial spaces too. Making them a great all-rounder.
Beadboard features long, vertical grooves; that are evenly spaced. They can either be installed for the entire wall height, or they can also be installed partially on the wall too. More often than not, beadboard is a go-to choice for those who have a home that is more rustic in its design.
When compared to some of the other options, shiplap is a more modern choice for your home. This style comes with horizontal boards that overlap each other, creating a weatherproof seal. It is this waterproof seal that makes it a good option for the exterior of your home.
Similar to shiplap is tongue and groove. This particular option connects differently to shiplap and when the panels fit together they have a protruding tongue on one board, which then clicks into the adjacent groove.
How to Install Wall Panelling in Your Home…
It might seem like creating your own wall panelling at home might be tricky, but in fact, once you know the basics, it can be quite straightforward. Unlike traditional panelling found in Victorian homes, today you can use MDF wall panels to create that same great look, at a fraction of the price. Using MDF wall panels also provides all of the benefits that wood panels do too.
To make things as straightforward as possible, consider buying a wall panelling kit. This will provide all of the panels that you need to create your panelled wall, all cut to size and ready to be installed. They can then simply be glued into place and painted to create your finished look.
If you’re planning on creating your own wall panelling to enhance your home, check out our full collection.
Tongue and Groove panelling is one of the most simple panelled looks. Traditionally found in country homes, this elegant and timeless style is now finding its way into more contemporary interiors. Versatile and unique, tongue and groove panelling can be created using MDF Wall Panels to elevate your home…
Benefits of Tongue and Groove Panelling…
If you love panelling but want to keep the look subtle and simple, tongue and groove is the perfect option. Whether you live in a historic farmhouse, a Victorian terrace or modern open-plan flat, introducing tongue and groove will instantly upgrade your interiors.
For country-style homes, tongue and groove always looks right at home, whereas in more modern properties, it will add character and charm, when this is often lacking. For contemporary interiors, consider a modern take on this classic look – opting for wider 100mm boards to create clean lines.
Introducing panelling is a great way to also add texture and a tactile finish, as well as interest, without the need for bold or fussy patterns, lots of fabrics or bright colours. Panelling can be painted in any colour, and allows you to be playful with your colour scheme.
For a modern style, panel the bottom half of the wall, but paint the walls and the panelling all the same colour. Calming and light colours look great when carried right through contemporary interiors. If you want to make more of a statement, try contrasting colours. Paint your panelling a dark shade, and the wall above in a lighter shade, to keep the focus on the panelling and ensure your room still feels bright and open. Or try a bold patterned wallpaper above your panelling, and pick out a shade within the paper to paint your panelling, for a cohesive and on-trend look.
Tongue and groove panelling is wonderfully versatile. It’s traditionally used in bathrooms, kitchens and pantries, but really, it can be used anywhere in the homes – even on ceilings, if you want to use this style in a whole new way. Think sloped ceilings, such as those in loft spaces, to add texture and interest to this often forgotten surface space.
Using MDF Wall Panels to Create Tongue and Groove Panelling…
MDF is a fantastic material to create tongue and groove panelling from. More cost effective than using wood, using MDF wall panels will help you achieve the same classic and stylish look at a fraction of the price.
Our MDF Wall Panel Strips are perfect to create tongue and groove panelling from. You can achieve the exact look you want, by selecting the exact thickness and width for your panelling strips. You can even choose to have your strips ready primed, so that all you have to do is install them on your chosen wall and paint them.
The quickest way to install wall panelling is by glueing the panels to the wall. If you use something like No Nails Adhesive, you can achieve a flush fit and a super-strong hold.
If you’re looking for a way to update your home and add impact, without having to spend a huge amount of money, adding tongue and groove panelling could be a great option. To get started, browse our MDF Panelling Srips here.
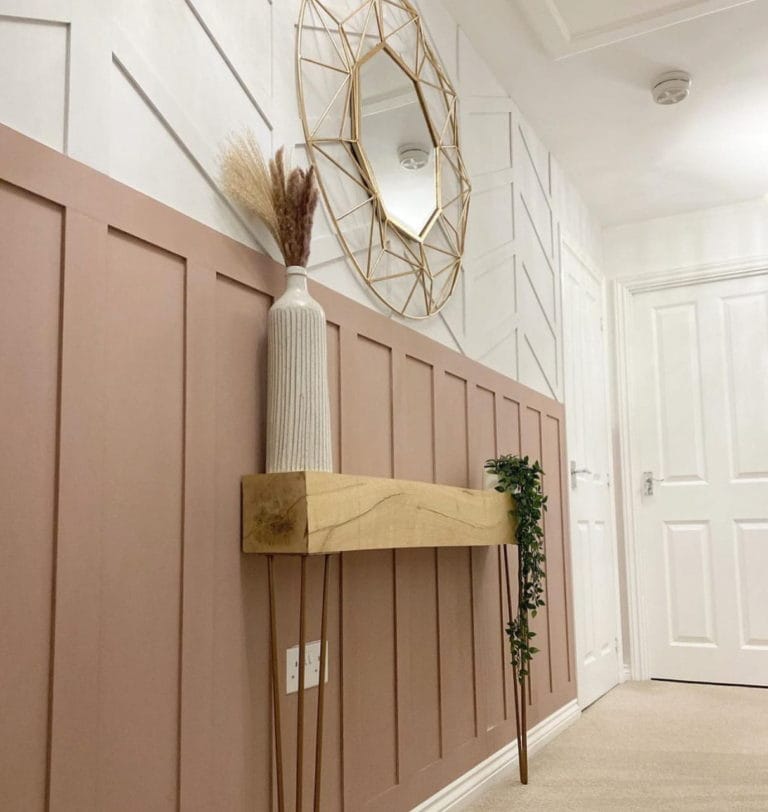
While panelling looks beautiful and is timeless, it’s actually incredibly practical for hallways too. Typically busy spaces, particularly in the case of entrance halls, hallway panelling is a great way to protect walls from scuffs and will generally cope much better with everyday life than simple painted walls. Great for reintroducing traditional features in period properties, hallway panels can also add character to contemporary homes too.
If you’re considering updating your hallway, read on to discover inspiration and ideas for hallway panelling, to help you finalise your concept…
Go for a Traditional Shaker Style
Shaker style panelling is a great option as it’s a traditional look that also has a modern feel to it too. More simple than other panelling styles, shaker panelling involves using flat panelling strips evenly spaced to create a simple pattern. Shaker panelling is typically to everyone’s taste, and you can decide how bold you want to go by finishing the look by painting your panelling in a colour of your choice.
To make creating your own shaker style panelling for hallways easy, try out panelling kit creator. Simply input the dimensions of your wall and we can provide you with an instant quote. If you decide to go ahead, you will receive your panelling kit ready to be installed in your hallway – no cutting needed, and you can even opt to receive your panels ready primed too.
Add a bold Pop of Colour
The hallway is often the first chance to make a great first impression when guests step into your home. If you’ve decided to go for half wall panelling, ending at dado rail height, this presents a great opportunity to add a splash of colour to your space. The sky’s the limit when it comes to the options here. For small and narrow hallways, try lighter colours to keep the space as bright and open as possible. If you are blessed with a large entrance hall, experiment with dark and rich tones to create a striking and atmospheric space.
Go for Floor-to-Ceiling Colour
Whether you’ve installed floor-to-ceiling hallway panels or half wall panelling, painting the whole wall the same colour will create a contemporary finish to this traditional style. A bright or dark colour will really make a statement, whereas a lighter shade will add interest for you to layer upon with artwork and stylish floor tiles.
If you are painting your panelling, don’t forget to prime MDF panels first. Once primed, you can use any walls and ceilings paint, which is helpful if the backing to your panelling is your walls, rather than backboard and means you don’t have to buy separate paints to achieve the same all over colour. We offer a priming service, which is free when you buy any of our wall panelling kits.
Ready to get started and transform your hallway? Shop our collection of wall panelling strips now.
A fantastic way to update and upgrade any bathroom is to introduce bathroom wall panels. Faster and more cost effective than tiling, panelling can create either a classic or a contemporary look and will offer protection to your walls as well as a high-end finish. Read on to discover inspiration and ideas for your bathroom wall panels…
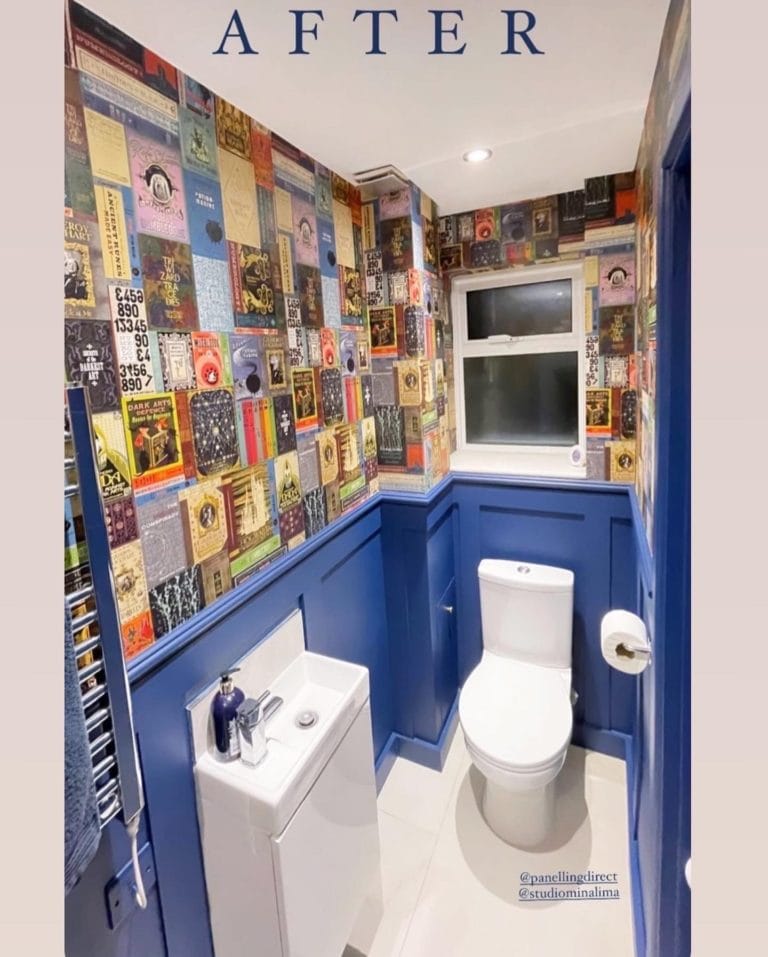
Create a Half Panelled Wall Look
Ideal for bathrooms, a half panelled wall look creates that same great style that you see with half tiled walls. Perfect for bathrooms big and small, a half panelled wall will draw the eye around the room, making small rooms look larger, and enhancing the space in bigger bathrooms.
Half wall panels can be installed behind your vanity unit or sink, freestanding bath and toilet – to achieve a professional finish, just make sure the panelling ends just above all of your fixtures. For bathrooms with separate showers, you could consider panelling most of the room, and combining this with floor-to-ceiling tiles behind your shower.
Go for Floor-to-Ceiling Panelling
If you want to make a real statement, try floor-to-ceiling bathroom panelling. This look works particularly well in bathrooms with unusual shapes, such as sloped ceilings, as it will enhance the architecture of the room.
While tiling a whole room can be very time consuming, panelling can achieve the same level of impact without taking as much time, and is also typically a more cost effective option too. We can create a panelling kit for you, using moisture resistant MDF panel strips. Ideal for use in bathrooms, our kits are ready to install, making the job even easier.
Go for Floor-to-Ceiling Panelling
If you want to make a real statement, try floor-to-ceiling bathroom panelling. This look works particularly well in bathrooms with unusual shapes, such as sloped ceilings, as it will enhance the architecture of the room.
While tiling a whole room can be very time consuming, panelling can achieve the same level of impact without taking as much time, and is also typically a more cost effective option too. We can create a panelling kit for you, using moisture resistant MDF panel strips. Ideal for use in bathrooms, our kits are ready to install, making the job even easier.
Add a Bold Pop of Colour
Make your bathroom wall panelling stand out by adding a bold pop of colour. For half wall panelling, you could either paint your panelling a bright or dark colour, or the wall above, or paint both the wall and the panelling in the same shade for a more subtle look. For full wall panelling, paint all of it in one vibrant shade, or try creating a feature wall, painting one panelled wall in a bright colour, and the rest of your panelling in a neutral tone. Colours that often work well on bathroom panelling include dark and rich blues, forest green, sage green, mustard yellow and dusky pink, but really, you could use any colour you wanted.
Bathroom panelling is a fantastic alternative to tiles. As previously stated, panelling is typically quicker to install and cheaper than tiling, plus it’s timeless, meaning it won’t date and will almost certainly add value to your home.
Wondering how to panel a wall? Luckily, it’s super easy – when you know how. Here, we’ll talk you through the six main steps to follow.
From traditional shaker styles to more modern slats, wall panelling is the perfect way to introduce rich textures and patterns to each room.
While panels can vary in style and materials, the steps to add them to walls are generally pretty similar.
We’ve broken down how to panel a wall in six key stages, so you can confidently decorate your home with new wall panels. Whether you want to panel an entire wall, a whole room or even multiple rooms, these steps will help to simplify the process for you.
Installing wood and MDF panels on walls
Step 1: Plan your panelling design
To create beautiful, professional looking planning, thorough preparation is essential.
Of course, the first step is to decide which rooms to panel. But you also need to think about the styles that best suit your home’s interior design
There are several types of panelling available, such as shaker style, wainscot kits, and tongue and groove panels.
One factor to consider is whether the walls you’re panelling are in high-traffic areas, such as staircases and hallways. If so, wainscot panelling may help to protect the walls from scuffs.
Looking for more inspiration? Visit our Instagram or see our list of the top wall panel designs.
Step 2: Measure the walls carefully
Once you’ve decided on the style and location of your new wall panels, it’s time to measure up.
Use a tape measure to check the wall’s width and height, from wall to wall and skirting board to ceiling. If you’re decorating multiple walls, note the measurements for each one, just in case there are any variations.
Double check the measurements, just to be sure. Panelling needs complete accuracy for a professional finish.
Unsure exactly how many panels you need? Try our wall panelling kit creator. All you need to do is enter your measurements and you’ll receive an instant quote.
After you’ve placed your order, we’ll create your bespoke kit, including all the wall panels you need. You’ll even receive your panels pre-primed, ready for you to install and paint.
Step 3: Prepare your walls for panelling
To get an even finish, it’s vital to prep your walls. Don’t miss this step!
Before applying any panels, sand down the walls using sandpaper or an electric sander. The aim is to make each wall smooth to the touch. This way, the panels should look neater once installed.
Remember to wear PPE, such as eye protection and ventilation masks.
And, for particularly uneven walls (which is common in older properties) consider using panelling backboards. These create a flat surface, making it much easier to secure wall panels.
Step 4: Install your panels to the wall
Now for the exciting part: the installation.
If you’re using a backboard, apply this to your wall first.
Next, measure the walls and lightly mark where you need to place the panels. A spirit level/laser level is useful at this stage to check that each panel is perfectly straight.
When installing then, start with vertical panels before moving onto the horizontal panels. This helps to ensure they’re all neatly arranged from the floor all the way to the ceiling.
Again, we suggest using a laser level to double check every panel is straight. And to secure the panelling to the walls, try No More Nails adhesive glue. Remember to press firmly to make sure they stick.
Depending on the type of panelling you choose, there can be variations in how to secure the different panels together. For example, tongue and groove panelling with fit together snugly, while board and batten style will consist of alternating wide and narrow boards.
If you have any questions about installing a specific type of panelling, feel free to get in contact with us for further advice.
Step 5: Use caulk to neaten the look
When the adhesive has fully dried, you then just need to complete the finishing touches.
Decorators caulk is great for filling in any gaps. Once dry, sand the caulk down to smooth out any bumps. This step is easy to forget, but skipping it risks having an unprofessional finish, so we do suggest factoring it into your wall panelling installation.
If you use one of our wall panelling kits, your panels will come ready primed. So, you’ll be ready to complete the look with the last stage: painting the panels.
Step 6: Paint the wall panelling
With the panels neatly applied on the wall, all that’s left is to paint them.
With MDF, in particular, this step is super easy. MDF has a smooth finish, so the paint should look really neat and smooth over the top.
The result? A beautifully panelled wall, with minimal effort.
Watch the video below for a step-by-step tutorial. And if you’re ready to get started, check out our full range of decorative wall panelling sheets.
https://www.youtube.com/watch?v=gT5pishdrvg
Shaker style, tongue and groove, wainscot, v-groove… It can admittedly be a bit of a headache working out which types of panelling are right for you.
You might see a house with gorgeous walls and think ‘I want that type of panelling’, without knowing what exactly ‘that type’ is. We completely get it – there are a lot of terms that mean pretty similar things for wall panelling.
That’s why we’ve put together this guide so you can easily compare common wall panelling styles and work out which ones are best for your home. So, if you’re ready to turn your wall panel ideas into a reality, see below for a breakdown of the top types.
6 different types of wall panelling
1. Wainscoting

A traditional type of wall panelling, wainscoting is one of the most popular styles. It’s known for its resilience to scuffs, making it ideal for high-traffic areas like staircases and cloakrooms.
It’s created through decorative mouldings in rectangle or square frames, using thin strips to achieve the look. Especially when pre-cut, it’s simple to install, and we have a step-by-step guide to panelling walls to make the process even easier.
And, to replicate the style in the above picture, try our Regal Wainscoting Wall Panelling.
2. Shaker style wall panels

For a classic square formation of panels, try ones in a shaker style. This is another popular type of wall panelling, adding understated detailing to rooms in a traditional style.
It’s sometimes referred to as board and batten, although the two styles are slightly different. Essentially, shaker style panels generally use square or rectangle frames. Board and batten panelling, on the other hand, tends to have more defined vertical lines.
We’ve focused on shaker style here but, ultimately, it’s a case of displaying MDF wall panelling strips in the style that best suits the room.
For cut-to-size shaker style panels, try our made-to-measure wall panelling creator. Simply input the measurements of your wall and receive an instant quote for a panelling kit that’s pre-primed and ready to be installed.
3. Slat wall

Slat wall panelling is a modern interpretation of what was originally a traditional style. It involves lots of thin, vertical panels, usually extending across the full height of a wall.
It can be created using MDF slat wall panels or wood beading.
If you choose to use wood to create a slat wall, you can wax or stain it for a natural look, or paint MDF panels to your desired colour.
4. Tongue and groove wall panels

Tongue and groove is one of the most popular MDF wall panel styles. It creates vertical panelling and is often used for half-wall designs.
One option is to get beaded tongue and groove panels for added texture. This introduces subtle detailing between each panel and avoids heavy shadows.
Or, if you’re looking for strong definition between the panels, look for v-groove panelling.
It creates a cosy, farm cottage style design. And, as it is a relatively simple design, it’s ideal in rooms like boot rooms and kitchens where you want pretty but unfussy panelling.
Keen to decorate your bathroom? Shiplap tongue and groove panels are a good option. They’re moisture resistant, letting you add a touch of sophistication to the room without needing to worry about them getting damaged by humidity.
5. Geometric panelling

This playful modern style involves creating geometric shapes on walls using panels or beading.
3D effect panels are great for geometric panelling. You can buy them in patterns like chevrons or tiles to create fun, vibrant designs on the walls.
You can also put your own twist on this style by designing a pattern with MDF panels and playing with negative space. To keep the look contemporary, we suggest painting the panelling and wall in the same colour for a sleek finish.
6. Ribbed wall panels

One of our favourite media wall ideas is adding ribbed panelling within shelving units for subtle decoration. When painted in the same colour as the rest of the wall, they create an interesting backdrop with soft, delicate shadows.
The example in the above photo was installed by Get That Covered using ribbed panels from Panelling Direct.
You can get ribbed panels in a range of sizes. We suggest opting for thinner ones for media walls to avoid them being overpowering.
However, if you’re planning to add ribbed panels to a bigger space, such as the full height of a wall, you might want to consider wider ones. See our full range of ribbed wall panels to compare different sizes.
Now you’re familiar with the different types of panelling, have a look through our favourite wall panel ideas for more DIY inspiration.