Is making music your passion? If so, then you’ve probably considered setting up a mini studio in your home – a space where you can create, record and simply enjoy playing your instruments. Whether you’re a guitarist, a pianist, a DJ, or an aspiring producer, having a designated area for your passion can make all the difference. But there is often one aspect that people overlook when setting up their music space… the acoustic treatment.
As you probably know, good acoustics can help you hear your music more clearly, without those annoying echoes, tinnyness and muddled sound. One of the best ways to improve the sound quality of your music space is to use acoustic panelling. Let’s dive into how you can create a designated music space in your own home that sounds awesome and why acoustic panelling is essential to this process.
Why Acoustic Panelling?
As sound travels, it bounces off surfaces like walls, floors and ceilings. If you’ve ever been in an empty room and noticed that the sound echoes, that is because there is nothing to absorb or diffuse the sound waves. When you’re making music, this echo can be a problem, making your recordings sound muddy or unclear; it might even make it harder for you to properly hear your own playing.
Acoustic panels absorb and diffuse sound waves, preventing them from bouncing uncontrollably around the room. By adding them to your room, you can:
– Reduce Echo: Panels aid in absorbing sound, reducing the amount of echo in the room.
– Improve Clarity: Without extra noise interfering, you will be able to hear your music more clearly.
– Balance the Room’s Sound: Acoustic treatment will ensure that sound doesn’t build up in specific areas (like corners), which leads to more balanced audio across the whole space.
– Prevent Sound Leakage: Although this may not be the primary function of acoustic panels, they can also help reduce the amount of sound that escapes the room, causing less disturbance to others.
Step 1: Choose the Right Room
Before you think about installing acoustic panels, you’ll need to select the right space in your home. It is best to choose a quiet area, away from the noise of spaces like the kitchen and living room. Rooms with carpeted floors are better than those with wooden or tiled floors, as carpets also aid in naturally absorbing sound.
You may overlook this, but the size of the room is also important. Smaller rooms are easier to acoustically treat, but you might want to note where sound can bounce. For example, rooms with lots of windows and high ceilings can be more challenging to treat because sound waves can easily reflect off these surfaces.
Step 2: Position Your Music Equipment
Once you have selected your room, it is time to arrange your instruments and other equipment. Where you place things such as your desk, computer, speakers, and other instruments can make all the difference in the sound in your room. Here are some top tips to keep in mind when arranging your room:
– Place Your Speakers Away from Walls: If you’re using speakers, avoid placing them directly against a wall. When they are too close to a wall, sound can build up and become too boomy or unclear. Instead, aim to have your speakers at least a few inches away from the wall and sitting at ear level.
– Position Yourself Symmetrically: Try to place yourself and your equipment in the centre of the room, or evenly between the rooms boundaries. This will ensure that sound is evenly distributed throughout the space.
– Avoid Clutter: Having the space filled with clutter can create unpredictable reflections of sound and more surfaces for the sound waves to bounce off, so try to keep the area organised and tidy.
Step 3: Applying Pre-Made Acoustic Slat Wall Panelling
Want a stylish but effective way to treat the acoustics of your music room? Then pre-made acoustic slat wall panels could be the perfect solution for you. These panels add a modern and sleek aesthetic as well as enhancing the quality of sound in your room, making them a popular choice for home music rooms.
Here is why they could be the best option:
– Style and Functionality: Unlike plain foam panels, slat wall panels have a clean architectural design, enhancing the visual aspects of the room.
– Effective Sound Treatment: Slats combined with acoustic backing can efficiently manage sound reflections and reduce echo, improving the clarity of sound in the space.
– Easy to Install: Pre-made panels are designed for an easy installation, which make them a great option to improve the acoustics of your room without overcomplicating the setup.
Where to Place Acoustic Panelling
Similar to traditional acoustic panels, placement is crucial for the acoustics of your room. Although they don’t need to cover every wall, they need to cover areas where the sound reflections are strongest. Here are some of the places you might want to think about placing slat wall panels:
– Behind Your Instruments: Installing panels behind your equipment, particularly speakers or amplifiers, helps prevent sound from bouncing off the walls behind them and improves clarity from all around.
– On Side Walls: By placing them on side walls at ear level reduces the first reflections of sound waves, which can lead to a more controlled sound environment from the start.
– Corners: Despite acoustic panels not being designed as bass traps, you can still place them near the corners of your room to absorb some lower frequencies that often build up in these areas.
Combining Acoustic Slat Panels with Other Acoustic Treatments
While slat wall panels can improve the acoustics of your music space significantly, they are best combined with other types of acoustic treatment, such as bass traps and additional absorption panels. The goal is to get the right balance – too many absorptive materials can make the room sound dull, whereas too few can leave an echo and sound imbalance in the space.
Step 4: Where to Place Acoustic Panels
Key to achieving the best sound in your designated music space is the placement on the acoustic panels:
– First Reflection Points: These are places in the room where sound from speakers or instruments first hits a wall before reaching your ears. To find these spots, sit in your prime listening position and have someone hold a mirror against the wall; where you can see the speaker in the mirror is a first reflection point. Placing panels in these spots will have a noticeable impact on the acoustics of the room.
– Corners: Low-frequency sound waves often build up in corners, so placing bass traps there is essential, especially if you tend to work with bass-heavy appliances or instruments.
Step 5: Fine-Tuning Your Space
Now that the panels are installed, you need to spend some time in your music room to fine-tune the acoustics. Play your instruments, listen to music, try recording a few things – really play about in your newly kitted out space. Pay attention to how the room sounds – are there areas with too much echo? Is the bass balanced? Make sure you are satisfied with the sound quality before you settle, in case any adjustments are necessary, such as panel placements or even increasing the number of panels.
Additional Tips for Your Music Space
– Furniture and Decorations: Furniture such as bookshelves, sofas and heavy curtains can also help in absorbing sound, so when kitting out your room consider adding these to the space. However, always be mindful of too much clutter.
– Soundproofing: If sound leaking out of the room and disturbing others is a concern of yours, you may want to look into some soundproofing options. While acoustic panels can aid in this aspect, complete soundproofing involves adding mass to the walls, floors and even the doors, which can be a longer and more thorough process.
– Lighting and Comfort: Be sure to remember that your music space is one where you should feel comfortable and inspired. Soft lighting, artwork, and other personal touches can make your room feel inviting and be a space you enjoy being in.
Utilising Acoustic Panelling in your home
Creating a home music studio does not have to be a complicated, daunting process. By choosing the right room, correctly positioning your equipment, and strategically placing acoustic panels you can create a music-making haven. Your recordings won’t only sound better, but you’ll also enjoy practising and playing in a room that feels comfortable and professional. Happy music making! We hope you found this guide useful 🙂
View our full range of Decorative Wall Paneling products
New styles added regularly!
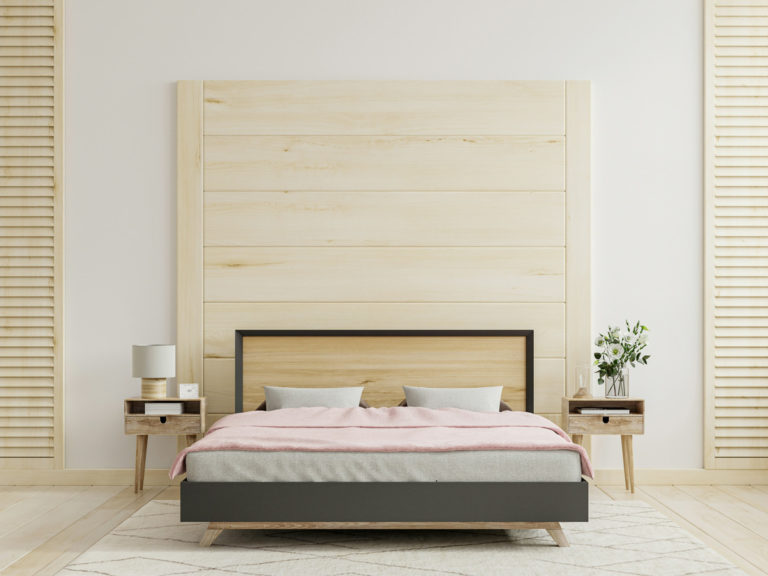
When decorating your bedroom, the bed is often the room’s focal point. The right headboard can transform your bed into a statement piece, making the space more inviting. However, buying a new headboard can be expensive, and sometimes, the style you want may not be readily available. That’s where a faux headboard comes in. By using wall panelling, you can create a stunning and cost-effective headboard that gives your bedroom a fresh, stylish look. Let’s take a deeper look.
Why Choose a Faux Headboard?
Before we dive into the steps, let’s explore why a faux headboard might be the perfect choice for your bedroom:
1. Cost-Effective:
Traditional headboards, especially those made from wood or upholstered in fabric, can be expensive, whilst creating a faux headboard with wall panelling is a budget-friendly alternative.
2. Customisation:
With a faux headboard, you can tailor it to perfectly match your room’s décor.
3. Space-Saving:
A faux headboard doesn’t take up any floor space, making it an excellent option for smaller-sized bedrooms.
4. Easy to Update:
If you ever decide to change your room’s theme or colour scheme, repainting or replacing the panels is much easier than replacing an entire headboard.
Now, let’s get into how you can create your own faux headboard using wall panelling.
Materials You Will Need:
– Wall panelling (MDF panels, shiplap, bead-board, or any other style you prefer)
– Measuring tape
– Level
– Pencil
– Saw (if you need to cut the panels to size)
– Construction adhesive or No Nails
– Finishing nails (optional)
– Paint or stain (if you want to customise the colour)
– Masking tape
– Sandpaper
– Caulk (for filling gaps)
– A damp cloth or sponge (for cleanup)
Step 1: Plan Your Design
Start by deciding on the size and shape of your faux headboard. Measure the width of your bed to determine how wide the headboard should be. Generally, you’ll want it to be at least as wide as the bed frame, but you can also extend it slightly beyond for a more dramatic effect.
Next, decide on the height. Some people prefer their headboard to reach just above the top of the pillows, while others like it to extend halfway up the wall. The height is entirely up to you, based on the look you’re going for.
Once you have your measurements, sketch out your design on paper. This will help you visualise the final product and make any necessary adjustments before you start cutting the panels.
Step 2: Prepare the Wall and Panels
Before attaching anything to the wall, you will need to prepare both the wall and the panels.
1. Prepare the Wall:
Ensure the wall is clean, dry, and smooth. If there are any holes or imperfections, fill them in with spackle and sand them down until smooth.
2. Prepare the Panels:
If your panels need to be cut to size, use a saw to do so. Sand the edges to ensure they’re smooth. If you plan to paint or stain the panels, now is the time to do it. Apply the paint or stain evenly and allow them to dry completely before proceeding.
Step 3: Mark the Wall
Once your design and measurements are ready, it’s time to mark where the panels will go on the wall.
1. Use your measuring tape and pencil to draw light guidelines where each panel will be placed. Make sure the lines are straight by using a level.
2. If you are creating a pattern with the panels, mark where each piece will go. For example, if you’re using shiplap, mark where the top and bottom edges of each panel will be so you know where to place them.
Step 4: Attach the Panels
Now comes the fun part.
1. Apply a generous amount of construction adhesive or liquid nails to the back of each panel. Be sure to apply it evenly, focusing on the edges and centre of the panel.
2. Carefully press the panel onto the wall, aligning it with the guidelines you drew earlier. Hold the panel in place for a few minutes to ensure the adhesive starts to set.
3. If you’re using heavier panels or want extra security, use finishing nails to hold the panels in place while the adhesive dries. Make sure to drive the nails into the wall studs for the best support.
4. Repeat this process for each panel until your entire faux headboard is in place.
Step 5: Finishing Touches
After the panels are securely attached to the wall, it’s time to add the finishing touches that will make your faux headboard look polished and professional.
1. Caulking:
If there are any gaps between the panels or between the panels and the wall, fill them with caulk. This will create a seamless look. After applying the caulk, use a damp cloth or sponge to smooth it out.
2. Touch-Up Paint:
If you notice any scratches or imperfections, use touch-up paint to cover them.
3. Cleanup:
Clean up any excess adhesive, caulk, or paint using a damp cloth to ensure your headboard looks pristine.
Step 6: Enjoy Your New Faux Headboard!
Once everything is dry and set, step back and admire your work. Your new faux headboard is complete! You’ve created a beautiful, customised focal point for your bedroom that adds both style and personality to the space.
Creating a faux headboard using wall panelling is a simple yet effective way to elevate your bedroom’s décor. Not only is it budget-friendly and customisable, but it’s also a fun DIY project that you can complete in just a few hours. With a little creativity and some basic materials, you can transform your bedroom into a stylish retreat.
P.S. If you want to make life a little easier, check out our Bespoke Headboard kits!
View our full range of Decorative Wall Paneling products
New styles added regularly!
Think of a basement, and the first thing that comes to mind could well be a dark, dingy space full of clutter. But with a little creativity and effort, you can transform a basement into a fun and functional space that adds real value to your home. Let’s explore some ideas for creating a fun basement space, with a special focus on how to use wall panelling to enhance the room’s atmosphere. Let’s dive in!
Firstly, it’s crucial to determine what kind of space you want your basement to become. Here are some options:
A Home Theatre:
If you’re a movie buff, a home theatre could be your basement’s calling. A Lazy boy chair and surround sound can turn your basement into a cinematic paradise.
A Game Room:
For families who love games, a basement can become a hub of fun. From a pool table to an arcade machine, you can make your basement the go-to spot for entertainment.
A Home Gym:
If fitness is a priority, a personal gym could be the right option for you. With the right equipment, you can work out without ever leaving the comfort of your home.
A Creative Studio:
Whether you’re into painting, crafting, or music, a basement can be the perfect place to let your creativity run wild.
Once you’ve decided on your basement’s purpose, you can move on to designing the space to match your vision.
Lighting:
Basements are often short on natural light, which means you’ll need to be strategic about your lighting choices. Try to aim for a mix of lighting sources:
Overhead Lighting:
Recessed lighting is a great choice in a basement. It provides bright, even illumination without taking up ceiling space, which is often at a premium in basements with low ceilings.
Task Lighting:
If your basement is to have multiple functions, like a bar area or a reading nook, task lighting can help define these spaces. Floor lamps, desk lamps, and under-cabinet lighting all work well.
Accent Lighting:
To add some atmosphere, consider accent lighting. LED strip lights, wall sconces, or fairy lights can create a cosy, inviting vibe.
Flooring:
When it comes to the basement, flooring is key. Basements are prone to moisture, so you’ll want something that can stand up to potential dampness while still looking good. Here are a few flooring options to consider:
Vinyl Planks:
Vinyl is water-resistant, easy to clean, and comes in a variety of styles that copy classic materials like wood, stone, or tile.
Carpet Tiles:
If you want a cosy feel, carpet tiles are a good choice. Easy to install, plus they can be replaced individually if damaged.
Epoxy Flooring:
For a more industrial look, epoxy is a durable and moisture-resistant option that’s also easy to clean.
Wall Panelling:
One of the most effective ways to elevate your basement’s aesthetic is by incorporating wall panelling. Easily add much needed texture and warmth – plus it can help to insulate the space and hide imperfections in the walls.
Wood Paneling:
Wood panelling can bring a natural, rustic feel to your basement. Whether you opt for classic shiplap or bead-board, wooden panels add character and warmth.
Wainscoting
Wainscoting is a type of panelling that covers the lower part of the walls. It’s a great way to add a touch of elegance to your basement. You can combine it with wallpaper or paint on the upper half of the wall to create a sophisticated, layered look.
Installing wall panelling in your basement is a relatively straightforward and fun DIY project. Shop the necessary supplies here.
Creating Zones: Making the Space Multifunctional
If your basement is large enough, consider considering dividing it into different zones. You can use furniture, rugs, room dividers and even wall panelling to delineate different areas:
– Entertainment Zone:
This could include a TV, couches, and even a bar area for drinks and snacks.
– Play Area:
If you have kids, a dedicated space for toys and games can keep the mess contained and give them a place to play.
– Work or Study Area:
If you need a quiet space to work from home or for your kids to do homework, set up a desk and comfortable chair in a well-lit corner.
– Relaxation Zone:
A cosy reading nook or meditation space can be a great addition if you want your basement to be a place of calm and quiet.
Adding Personal Touches
Whether it’s artwork or family photos, these items make your space feel uniquely you. Another great way to personalise your basement is through colour. While basements often benefit from lighter colours to make them feel more spacious, don’t be afraid to use bold accent colours or wallpaper to add personality and flair.
Easy steps to transform a basement
Creating a fun basement space is all about making the most of an often underutilised area of your home. By carefully planning the layout, lighting, flooring, and wall treatments – especially with the addition of stylish wall panelling – you can turn your basement into a versatile and inviting space for you and your family.
View our full range of Decorative Wall Paneling products
New styles added regularly!
When it comes to adding character to a room, the walls often serve as a blank canvas. While you can always simply paint or add wallpaper, the addition of wall panels can transform a plain space into something truly special. Let’s dive right in and find out more.
What Are Wall Panels?
Wall panels are large sheets of material that can be affixed to walls. They come in various materials, including wood, MDF, plastic, and even metal. Depending on the look you want they can either cover an entire wall or just a section of it. They also come in a variety of designs, from refined flat panels to more elaborate, textured ones.
Why Choose Wall Panels?
1. Versatility:
Wall panels come in tonnes of different styles and materials. This makes it easy to find something that fits your taste. Whether you want a sleek, modern look or something more rustic and traditional, there’s a style that will suit your needs.
2. Texture and Depth:
They add a physical texture to your walls. Creating a sense of depth and added dimension, making the room feel more dynamic and interesting. Even in a small space, the right panels can add character to your room without overwhelming it.
3. Durability:
They are more durable than paint or wallpaper. Additionally, many are designed to be resistant to scratches, stains and moisture. This makes them a great option for high-traffic areas or homes with children and pets.
4. Concealing Flaws:
If your walls have any imperfections – cracks, uneven surfaces, or other issues – wall panels can be a great way to cover them up.
5. Easy Installation:
Depending on the type of panel you choose, installation can be relatively simple. High-quality panels, like those stocked here at Panelling Direct, require nothing more than No Nails adhesive to securely apply.
Here are some of the most popular options:
Shiplap Panels
Shiplap has become increasingly popular, thanks in part to its frequent use on home improvement shows. These wooden panels are installed horizontally, with a small gap between each one, creating a clean, linear look. Shiplap is often used in farmhouse or coastal-style homes but can be adapted to suit a variety of styles.
Wainscoting
Wainscoting involves installing panels on the lower half of the wall, usually topped with a decorative moulding. This is a classic look that adds elegance, found often in traditional and contemporary settings. It’s especially effective in dining rooms, hallways, and entryways.
Bead Board
Bead-board is similar to shiplap but with a more intricate, detailed design. The panels feature vertical grooves, or “beads,” giving them a slightly more traditional feel. Bead-board is often used in cottage-style homes and is an especially popular choice in bathrooms and kitchens (shop our Moisture Resistant panelling).
How to Choose the Right Wall Panels for Your Room
It’s important to consider the style of your room, the level of maintenance you’re willing to commit to, and your budget.
1. Consider Your Room’s Style:
Think about the existing style of your room and how you want to compliment your space. If you have a modern space, sleek wooden options might work best. If you have a more traditional room, wainscoting or bead-board could be the way to go.
2. Maintenance Requirements:
Some panels require more upkeep than others. For example, fabric panels might need to be cleaned more frequently, while wooden panels could require occasional refinishing. Make sure you are comfortable with the maintenance level before making a decision.
3. Budget:
Wall panels can range from affordable to quite deer, depending on the material and design. Be sure to factor in the cost of installation as well (especially if you are hiring a professional).
Installing Wall Panels
Here are a few tips to help you get started:
Measure Carefully:
Before you buy your panels, measure your surface to ensure you purchase the right amount. It’s always a good idea to buy a little extra, just in case you make a mistake with the installation.
Prepare the Wall:
Make sure your wall is clean and dry before installing the panels. If there are any major imperfections, try to smooth them out as much as possible.
Follow Instructions:
Be sure to read the manufacturer’s instructions carefully, and don’t be afraid to ask for help if you need it.
Adding Character to a room – one panel at a time!
With so many options to choose from, you can find the perfect panels to suit your taste. Browse our catalogue now to find yours.
View our full range of Decorative Wall Paneling products
New styles added regularly!
When it comes to your home, the staircase is one of the most visible areas. One way to make yours stand out is staircase panelling. Let’s take a look at two of the most popular types.
Shaker Style Panelling
Known for its clean lines and minimalist aesthetic, Shaker style panelling is characterised by square-edged, flat panels framed by simple, narrow rails. It works well in both traditional and modern homes.
Why Choose Shaker-Style Panelling?
Versatility: Shaker-style panelling complements many different interior styles, adding visual interest without overpowering the other features in your home. It has a timeless appeal and style that adapts to evolving trends. Additionally, shaker style panelling is fully customisable, allowing you to choose the right height and width of the panels for your space.
How to Incorporate Shaker-Style Panelling on Your Staircase Walls
Consider the following steps:
1. Measure the Staircase Wall:
Start by measuring the staircase wall to determine the size and number of panels needed. Note: You’ll need to find the angle of the slope of the staircase and then cut to fit the incline.
2. Choose Your Material:
MDF is a popular choice for Shaker panels as it’s much cheaper than other materials, easy to paint and has a smooth, clean finish. Solid wood is an excellent option for those working with a higher budget and who have more time on their hands.
3. Decide on the Colour:
For a contemporary feel, darker shades could be the right choice. Or shades of white. Make sure whatever you choose works well in your space.
4. Finish with Decorative Elements:
It’s easy to enhance shaker style panelling with additional elements. Skirting and dado rails are cost-effective choices that add another layer of detail.
Bead and Butt Panelling
Bead and Butt panelling, more commonly known as tongue and groove, is another great choice for staircase walls. This style is commonly found in coastal or cottage-style interiors and gives your home a warm and cosy feel. Bead and Butt panelling can easily be painted and glossed, which also works well in modern spaces.
Why Choose Bead and Butt Panelling?
Classic and Cosy:
Bead and Butt panelling can be a great choice for creating the illusion of height due to its vertical lines. The material is durable and strong, making it ideal for busy households. Additionally, it is easy to maintain and keep clean, making it a great option for families with young children.
Customisable Look:
There are two choices when considering the look and feel. Wider boards bring a contemporary feel, especially when painted and glossed. Narrow boards are the more traditional option.
How to incorporate Bead and Butt Panelling on your Staircase Walls
To install Bead and Butt panelling on your staircase walls, follow these tips:
1. Select Your Panel Size and Material:
The panels can be made from MDF or solid wood. Depending on the look you want, wood provides an authentic feel, whilst MDF is affordable, and easy-to-paint.
2. Measure and Cut Panels to Fit the Stair Slope:
It’s important that you measure the angle of your staircase accurately, as you will need to cut the panels precisely to fit them.
3. Decide on a Finish:
Bead and Butt panelling can be left natural for a rustic feel or painted in colours that complement your interior style. For a cottage style or coastal look, white or pastel shades work well, while bolder colours can give a more modern look to your home.
4. Add Trim:
Adding trim, which is popular in farmhouse-style homes and adds a traditional aesthetic, can give your panels a polished finish.
Other Panelling Ideas to Consider
Other styles that could be an option for your home are Board and Batten and Geometric panelling. Let’s discuss these options below.
Board and Batten:
Gives your home a traditional farmhouse vibe and a rustic feel. Board and Batten consist of wide vertical boards separated by narrow wooden strips. This option is easy to install and looks great.
Geometric Panelling:
If patterns are your thing, then Geometric panelling may be for you. This option gives your home an artistic look and a bold, modern twist.
Tips for Choosing the Right Staircase Panelling Style
Consider the Overall Style of Your Home:
When exploring panelling options, it’s handy to think about the rest of the decor in your home so the style compliments what you already have. Think about the overall theme and the type of home you have. For example: Traditional, minimalist, cottage or farmhouse style.
Think About Colour:
The colour of your panelling will definitely affect the ambience of your home, so with the style you choose, you will also need to consider your options. Examples are lighter shades for an open and airy feel or darker tones for a dramatic touch.
Everything in Proportion:
If it is too high, it might overwhelm the space; if it is too low, it might not have the desired impact.
Staircase panelling made simple
Staircase wall panelling is a fantastic way to enhance the visual appeal of your interior.
Choosing the right style is key, so take your time and look for some examples. Get a feel of what the different styles have to offer; after all, your home is a reflection of your personality!
View our full range of Decorative Wall Paneling products
New styles added regularly!
Painting a panelled wall can dramatically transform the look of a room, adding depth and texture. Whether you’re dealing with timber panelling or modern MDF panels, the steps remain largely the same. Here are some tips to ensure your panelled walls look professionally painted, even if you’re a DIY novice.
1. Gather Your Supplies
Here’s what you’ll need:
– Paint (primer and topcoat in your chosen colour)
– Masking tape
– Rollers (including a smaller roller for narrow panels)
– Angled paintbrushes (for detailed work)
– Drop cloths or plastic sheeting
– Sandpaper (medium and fine grit)
– Spackle or wood filler (if needed)
– A damp cloth or tack cloth
– A paint tray and stir sticks
N.B. Having everything ready will save you time and prevent unnecessary trips to the hardware store.
2. Prepare the Room
Preparation is key. Start by clearing the area around the wall you intend to paint. Move furniture away, and cover the floors with cloths or plastic sheeting to protect against spills and splatters. Use masking tape around the edges of the wall, including door frames, window sills, and baseboards.
3. Clean and Sand the Panels
Panelled walls, especially older ones, tend to get dusty and grimy over time. Start by thoroughly cleaning the wall using a mild soap and water solution. For grease or tough stains, a mix of water and vinegar can be effective. Then wait for the wall to completely dry.
Next, sand the panels lightly to create a smooth surface for the primer and paint. If your wall has grooves or is heavily textured, make sure to sand these areas as well. Use medium-grit sandpaper for initial sanding, and then switch to fine-grit to achieve a smoother finish. Once sanding is complete, wipe down the wall with a damp cloth to remove dust/debris.
4. Repair Any Imperfections
Inspect the panelled wall for any dents, holes, or cracks. Use spackle or wood filler to repair these imperfections. Follow the directions given on the product. Once dry, sand the repaired areas to blend seamlessly with the rest of the wall.
5. Apply Primer
Primer is essential when painting panelled walls, especially if the panelling is dark or heavily varnished. It helps to seal the surface, prevents stains from showing, and allows the paint to adhere better. Use a high quality primer designed for wood or MDF, depending on your panel type.
Start by using an angled/edging brush to apply primer into the grooves and edges of the panels. Then, use a roller to apply the primer to the flat surfaces. Make sure everything is covered evenly and allow the primer to dry. In some cases, you might need a second coat of primer if the panels are particularly dark or heavily stained.
6. Choose the Right Paint
Choosing the right type of paint is crucial for a long-lasting and beautiful finish. For panelled walls, a satin or semi-gloss finish is often the best choice. These are durable, easy to clean, and enhance the texture of the panelling.
Make sure to select a high-quality paint designed for wood or panelling. Cheap paints may require multiple coats and still not provide the desired finish, ultimately costing you more time and money.
7. Paint the Panels
Start by painting the grooves and edges of the panels with an angled brush. This ensures you cover the more intricate parts of the panelling. Once the grooves and edges are painted, use a roller to paint the flat parts. Work in small sections, maintaining a wet edge to prevent visible lines and streaks.
If you’re using a brush and roller combination, always follow the direction of the panels to create a uniform look. Depending on the colour and type of paint, you may need to apply two or three coats. Make sure each coat is dry before applying the next one. This prevents smudging, peeling and uneven finishes.
8. Inspect and Touch Up
Inspect the walls for any missed or uneven areas. If you find any imperfections, use a small brush for touch-ups. Ensure all painter’s tape is removed carefully to avoid pulling up any fresh paint. If you notice any paint bleeding under the tape, use a small, fine-tipped brush to correct it.
9. Final Touches and Clean Up
When you are satisfied with the painted panels, remove all drop cloths and protective sheeting. Then carefully move furniture back into place.
Always clean your brushes, rollers, and any other tools immediately to prolong their lifespan. Stand back and admire your hard work — a freshly painted panelled wall can make a room feel brand new!
Additional Tips for Painting a Panelled Wall
– Good natural lighting helps you see where you’re painting and spot any drips or uneven coverage.
– Ventilation! Ensure the room is well-ventilated to help the paint dry faster and reduce fumes.
– Don’t Rush: Allow each coat of paint to dry thoroughly before adding another. This patience will pay off with a more polished finish.
Painting a panelled wall may seem daunting, but with preparation and a little patience, you can achieve stunning results. Following these steps will help you create a beautifully painted panelled wall that adds charm and character to the room. So roll up your sleeves and get ready to transform your space!
View our full range of Decorative Wall Paneling products
New styles added regularly!
Panelling a ceiling is a great way to add style, texture, and character to a room. Whether you want to cover up imperfections, add warmth with wood, or create a modern look.
However, before you start panelling your ceiling, there are several important things you should know. This guide will help you understand the key considerations, materials, tools, and steps involved, ensuring your project is successful.
So let’s dive right in!
1. Understand the Types of Ceiling Panels
There are various types to choose from, and each comes with its own set of advantages and disadvantages. The most common choices include:
Wood Panels:
These include pine, cedar or oak and can add warmth and a classic rustic look to your room, depending on the style you are going for you may want to paint, stain or go natural in the finish. High quality wood panels may be one of the more expensive options, but the other side of this coin is that they can create a stunning aesthetic.
Gypsum or Plasterboard Panels:
Commonly used for creating smooth and even ceilings. They can be painted in any colour and are relatively easy to install. However, they are heavy and may require extra support during installation.
Metal Panels:
Metal panels, such as tin or aluminium add a unique industrial look to a room. They are durable and fire-resistant, but they can be more challenging to install due to their weight and need for precision cuts, which will require the correct tools to do the job correctly.
Acoustic Panels:
These are designed to reduce noise levels in a room and are often used in offices, home theatres, or music studios. Acoustic panels can be made from various materials, including foam or fabric, and they come in a variety of styles and colours. Shop our range of acoustic panelling.
2. Measure Your Ceiling Accurately
Accurate measurements are crucial when panelling a ceiling. So, take the time to measure the length and width of the room, and consider any architectural features such as beams, light fixtures, or vents. Remember, measure twice, cut once.
Another thing to remember is that thick panels on a low ceiling will make your room feel smaller. Higher ceilings will happily accommodate more substantial options without feeling cramped.
3. Prepare the Ceiling and Room
Before installation, the ceiling surface must be clean, dry, and in good condition. Remove any old fixtures, fill in cracks or holes with a suitable filler, and sand the surface to ensure it is smooth and level. Preparation is vital because an uneven ceiling can lead to poorly fitted panels and a poor looking finish.
Remember, clear the room and cover with protective sheets to prevent dust and debris from getting on your belongings. You should also ensure that you have proper ventilation, especially if you are working with materials like wood or plaster that can generate dust.
4. Gather the Necessary Tools and Materials
Having the right tools and materials on hand will make the installation process smoother and more efficient. Common tools and materials needed for ceiling panelling include:
– Measuring tape and level
– Saw (for cutting panels to size)
– Hammer or nail gun
– Adhesive (if required for your type of panel)
– Screws, nails, or other fasteners
– Safety gear, such as goggles and a dust mask
– Ladder or scaffolding for reaching the ceiling safely
Make sure you have all these tools and materials ready before you begin the installation to avoid unnecessary interruptions.
5. Plan the Installation Process
The installation process for ceiling panels varies depending on the type of panel and the method you choose. Some panels are designed to be nailed or screwed directly into ceiling joists, while others may require a grid system or adhesive.
Here are a few key points to consider:
Find the Joists:
Most ceiling panels need to be attached to ceiling joists for stability. Use a stud finder to locate the joists and mark their positions.
Start from the Center or a Corner:
Depending on the room’s layout, it’s usually best to start from the centre of the room or from one corner. This allows you to work evenly and make adjustments as needed.
Cut Panels to Size:
Measure twice, cut once, accounting for any obstacles like lights or vents. Precision is key to ensuring a neat, professional look.
Secure Panels Properly:
Ensure each panel is securely fastened to prevent sagging or falling. This is especially important for heavier materials like wood or metal.
6. Be Aware of Safety Considerations
Working on a ceiling can be physically demanding and potentially dangerous if safety precautions are not taken. Here are some safety tips to keep in mind:
– Always use a sturdy ladder or scaffolding to reach the ceiling. Never stand on chairs or unstable surfaces.
– Wear safety goggles to protect your eyes from dust and debris.
– If you’re cutting panels or working with adhesives, use a dust mask or respirator to avoid inhaling harmful particles or fumes.
– Have a helper available if possible, especially when lifting and securing large panels.
7. Plan for Finishing Touches
After the panels are installed, you’ll need to add the finishing touches. This might include filling in gaps with caulk or filler, painting or staining the panels, and reinstalling any ceiling fixtures like lights or fans. Take your time to do it right.
Panelling a ceiling can be a great project to transform the look of your room. By making sure you have the right tools and the correct safety gear, you can achieve a beautiful look and a professional finish. Plan your project carefully, and the results can be both satisfying and rewarding.
View our full range of Decorative Wall Paneling products
New styles added regularly!
When considering materials for wall panels, Medium Density Fibreboard – aka MDF is often the go to. But why? Below, we explore the qualities that make it such a reliable option for your wall panels.
What is MDF?
MDF is a wood product made by processing hard or soft wood and turning it into fibres. These are then mixed with wax and resin and pressed under high temperatures to form sturdy, solid boards.
Key Characteristics of MDF
1. Smooth Surface
Unlike natural solid wood, where you can find knots and grains on the surface – MDF has none. Instead, it has an incredibly smooth surface. The clean finish and smoothness make MDF perfect for wall panels, where these qualities are a big part of the appeal.
2. Consistent Density
MDF has a uniform density throughout the board, meaning the same strength and smoothness is maintained across the entire panel. This makes the material predictable during cutting, sanding and painting.
3. Affordability
One reason MDF is so popular is its price. Being much cheaper than solid timber, it’s an affordable option for homeowners and builders who want budget-friendly quality materials and finishes. Despite MDF being a cheaper option, it still delivers excellent results in appearance and durability, giving you the greatest value for your money.
4. Eco-Friendly
MDF supports eco-friendly building practices by utilising wood that may otherwise go to waste. If you are passionate about sustainability and the effect your renovations have on the environment, then MDF can be a responsible choice.
Why MDF is Ideal for Wall Panels
Now that you understand the material, let’s delve into why MDF is so well-suited for your wall panels.
1. Easy to Customise
Walls come in all shapes and sizes, so cutting wood to fit the specific size you require can be tricky for some. MDF however can be easily cut, shaped and routed. Whether you seek simple flat panels or intricate decorative designs, MDF can be tailored to meet your exact wants and needs. Its versatility allows you to create unique wall panels that reflect your personal style and aesthetic.
2. Durability
MDF is a durable material and doesn’t suffer from some common issues natural wood does, such as warping, cracking and splitting – especially in environments with fluctuating temperatures. MDF panels hold their shape and structure over time. A note to remember: MDF is not naturally water resistant, so if you are thinking of using it in a bathroom, make sure it’s been treated to be moisture resistant.
3. Paint-Friendly
One reason MDF is so appealing is its ability to take paint exceptionally well. Because of its very smooth surface, it is perfect for painting over with minimal preparation needed. So, if you want to customise your walls with different colours or finishes, MDF is ideal.
4. Sound Insulation
Because of its density, MDF has sound-dampening qualities, which can be beneficial for wall panels. The material’s structure helps it absorb sound, reducing noise between rooms. Need a space where peace and quiet are important? MDF panels are a great choice.
MDF in Modern Design Trends
Here are a few ways MDF wall panels are being used in modern interiors:
– Textured Wall Panels: MDF is often carved into geometric patterns, designs, or other textured finishes that add depth and visual interest to walls. This trend has gained popularity for making a room feel unique and dynamic.
– Accent Walls: MDF is perfect for creating bold accent walls. A focal point can be created by covering a single wall with MDF panels, drawing the eye in and adding character to the room.
– Minimalist Aesthetics: For those who prefer a more understated look, MDF panels can be left simple and flat, blending into the background while adding a subtle touch of sophistication.
Your walls are safe with MDF panels
MDF is the go-to material for wall panels thanks to its smooth surface and consistency. Its ease of customisation, durability, and soundproofing properties only add to the appeal.
Whether you’re designing a sleek, modern interior or creating a cosy, traditional space, MDF wall panels provide the versatility and quality you need to bring your vision to life. For anyone looking to enhance the aesthetic of their home without compromising on durability or budget, MDF is a top contender for wall panels, delivering both style and substance in abundance.
View our full range of Wall Paneling products
New styles added regularly!
Adding wall panelling is a great place to start if you want to transform your living room. Here are seven ideas for living room wall panelling that will inspire you to enhance your home.
1. Classic Wood Panelling
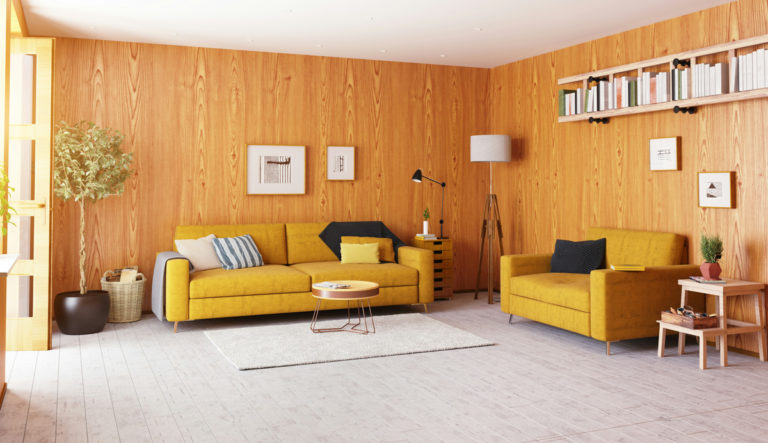
Wood panelling is an option that can bring warmth and richness to your living room. It’s often associated with traditional or rustic styles but can also be adapted for modern homes. You can choose a variety of woods, from pine and oak to walnut or reclaimed barn wood. The colour and grain can add texture and depth to the room, and the wood can be stained or painted.
Wood panelling can be installed on full walls or applied as wainscoting, where the panels cover only the lower half of the walls. This option works particularly well in living rooms with high ceilings, adding a sense of proportion and balance.
2. Shiplap Panelling
Shiplap panelling has become increasingly popular in recent years, especially in homes with a coastal or farmhouse aesthetic. Initially used in barns and ships, shiplap consists of long horizontal boards with slight gaps between them. This panelling style can give your living room a relaxed, airy feel.
Shiplap is usually painted white but can also be stained or painted in other colours to suit your décor. Its clean, simple lines make it versatile and can work in contemporary and more rustic settings.
3. Geometric Panelling
Geometric panelling can be a stunning choice for a more modern and artistic touch. This type of panelling involves using wood or other materials to create raised patterns on the wall, such as squares, rectangles, or even more intricate shapes like hexagons or diamonds.
Geometric panelling can be painted boldly to make it stand out as a feature wall or painted the same colour as the rest of the room for a more subtle, textured effect. It’s a great way to add a sense of creativity and personality to your living room.
4. Beadboard Panelling
Beadboard is another classic panelling style that adds charm and texture to a living room. This type of panelling features narrow vertical planks with small ridges (or “beads”) in between. It’s often used in cottage-style homes but can work in various interiors, including traditional and coastal designs.
Beadboard can be installed as wainscoting or applied to full walls. It’s typically painted white or a soft pastel colour, giving your living room a light, breezy feel. Beadboard is simple to install, making it a good option for DIYers.
5. Board and Batten Panelling
Board and batten is a wall panelling style that features wide, vertical boards with narrow wooden strips (called battens) placed over the seams between the boards. This creates a structured, grid-like pattern on the walls, adding depth and texture.
Board and batten panelling is often used in traditional-style homes. However, it can also be adapted for modern interiors. It works well as an accent wall in the living room, and you can paint it in a bold colour to make it a focal point.
6. Wallpapered Panelling
If you’re torn between wallpaper and panelling, why not combine the two? Wallpapered panelling involves installing wood panelling, such as wainscoting or shiplap, on the lower part of the wall and then applying wallpaper to the upper section. This creates a contrast that adds texture to your living room.
Choose wallpaper in a pattern that complements your panelling. For example, floral or damask prints can add a touch of elegance. At the same time, geometric or abstract designs can give the room a more contemporary feel. This idea allows you to mix materials and styles creatively.
7. Painted MDF Panelling
MDF is a budget-friendly alternative to timber, making it an excellent option to keep costs low. It can be painted to suit your living room’s colour scheme.
MDF can create various panelling styles, including shiplap, beadboard, or custom geometric patterns. Because MDF is smooth and easy to work with, it gives a clean, polished look when painted. This option is excellent for those looking to add panelling on a budget without sacrificing style.
Living Room Wall Panelling: Final Thoughts
Wall panelling is a great way to add personality, texture, and character to your living room. From the timeless appeal of wood panelling to the creative potential of geometric or textured metal designs, wall panelling can transform your living room into a space that’s uniquely yours.
Take inspiration from the ideas above and consider how each could enhance your home’s interior. Whether updating an entire wall or adding an accent, wall panelling offers endless possibilities to elevate your living room design.
View our full range of Wall Paneling products
New styles added regularly!
When it comes to home decor, the walls in your home play a crucial role in setting the tone for your space. However, bare walls can sometimes feel a little uninspired. That’s where half wall panelling comes in!
What Is Half Wall Panelling?
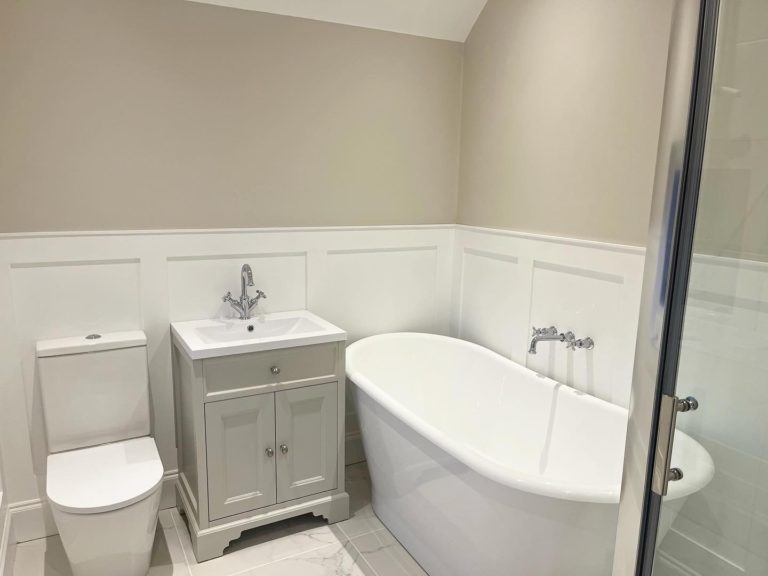
Half wall panelling, also known as wainscoting, is a type of wall treatment where panels are fitted to the lower portion of a wall. The panelling typically covers the bottom third or half of the wall, leaving the upper section bare or painted. This method was originally used for practical purposes, such as protecting walls from scuffs and damage. Still, over time, it has evolved into a design element that adds texture and visual interest to a room.
Why Choose Half Wall Paneling?
Before diving into the different styles, let’s talk about why you might want to consider half wall panelling for your home:
1. Adds Texture and Interest: Plain walls can feel flat, but panelling adds depth and dimension, making the room feel more layered and complete.
2. Protects Walls: Half wall panelling can protect your walls from scuffs, especially in high-traffic areas like hallways, dining rooms, or entryways.
3. Easy to Update: If you ever want to change the look of your room, you can easily paint or update the panelling without needing a complete renovation.
4. Increases Home Value: Quality panelling can add a feel of sophistication to your home, which may make it more appealing to potential buyers.
Popular Half Wall Panelling Styles
There are several styles of half wall panelling to choose from, each offering a unique look. Here are some of the most popular options:
1. Beadboard Paneling
Beadboard is a classic style of panelling that features narrow, vertical planks with a small ridge or “bead” between each one. It’s popular for cottages, beach houses, or anywhere needing a casual, cosy feel.
– Best For Bathrooms, kitchens, and mudrooms, where a light, airy look is desired.
– Colour Tips: Traditionally painted white, beadboard also looks great in pastels or soft neutrals for a more contemporary feel.
– Installation Consideration: Beadboard comes in panels or individual planks. The panels are easier to install, while the planks offer a more authentic, handcrafted look.
2. Board and Batten
Board and batten panelling features wide, vertical boards separated by thin strips of wood (battens). This style is versatile and can achieve both rustic and modern looks depending on the finish and the space.
– Best For Dining rooms, living rooms, and bedrooms for a clean, structured appearance.
– Colour Tips: Deep, rich colours like navy or charcoal give the board and batten a dramatic look, while white or light grey makes them feel more traditional.
– Installation Consideration: This style can be done using MDF boards for a budget-friendly option.
3. Shiplap
Shiplap consists of horizontal boards with a slight gap between each one. It has become a trendy interior design feature, used initially as exterior siding, especially in farmhouse-style homes.
– Best For Living rooms, entryways, and bedrooms where you want a rustic or farmhouse vibe.
– Colour Tips: While white is the most popular colour for shiplap, darker colours can make a bold statement.
Installation Consideration: True shiplap boards have a rabbeted edge, creating a tight, overlapping fit.
4. Raised Panel
Raised panel wainscoting is the most traditional and formal style of half wall paneling. It features panels slightly raised from the wall, giving the surface a detailed, three-dimensional appearance.
– Best For: Dining rooms, libraries, and formal spaces where you want to create a sophisticated and classic look.
– Colour Tips: White, cream, or soft grey keeps the look elegant, but darker shades like navy or deep green can add a dramatic touch.
– Installation Consideration: Raised panelling requires precise woodworking, so it’s best to hire a professional if you want a flawless finish.
5. Flat Panel
Flat panel wainscoting, or recessed panel, features flat, smooth panels with simple moulding. It’s a more streamlined and contemporary version of raised panelling.
– Best For: Modern or minimalist spaces like home offices or living rooms.
– Colour Tips: Monochromatic colour schemes work well with flat panelling, allowing the texture to be the star of the show.
– Installation Consideration: This style is easier to install than raised panelling and offers a sleek, clean look.
6. Chevron or Herringbone Patterns
Consider a chevron or herringbone pattern for a more modern or eclectic look. This style involves cutting the panelling into angled pieces and arranging them in a zigzag pattern.
– Best For: Accent walls in living rooms, bedrooms, or entryways where you want to make a bold statement.
Colour Tips: Use a single colour to let the pattern shine or two contrasting colours for a more eye-catching effect.
Installation Consideration: This style is more labour-intensive. It might require professional installation, but the result is a stunning focal point.
How to Choose the Right Half Wall Paneling for Your Space
When deciding on the correct type of half wall panelling for your home, consider the following factors:
1. Style of Your Home: Choose panelling that complements the architectural style of your home. For example, beadboard works well in cottage-style homes, while raised panels suit more traditional spaces.
2. Room Function: Consider the room’s function. High-traffic areas may benefit from more durable materials like timber. At the same time, a formal dining room may warrant more intricate designs like raised panelling.
3. Budget: Panelling can range from affordable to very expensive, depending on the materials and complexity of the design. If hiring a professional, be sure to factor in the installation cost.
4. Personal Taste: Ultimately, choose a style that you love. Panelling is a long-term investment in your home’s design, so ensure you’ll enjoy it for years.
Half wall panelling ideas: In Summary
Half wall paneling is a fantastic way to elevate your home’s interior design. With so many styles and options, there’s something to suit every taste and budget. Whether you prefer the classic look of beadboard, the sleek lines of flat panelling, or the bold statement of a chevron pattern, half wall panelling can transform your home into a more stylish, polished, and welcoming space.
Take the time to explore different styles, consider your home’s needs, and choose the option that best reflects your personality and design goals. Happy decorating!
View our full range of Wall Paneling products
New styles added regularly!